

Whether it's assembling a power bank, replacing equipment batteries, recycling second-hand cells, or routine battery maintenance, the biggest headache for everyone is: Are the cells in your hand really good, are they usable, and do they pose safety risks?
Many people only look at voltage readings, but a single data point is not enough to determine the cell's status. Inferior, aged, falsely labeled, or exceeding internal resistance cells may have a completely normal no-load voltage, but they drop voltage once loaded, are not durable, and are prone to overheating and swelling.
Today, I've compiled a set of battery cell testing methods that ordinary people can use, with zero professional equipment barriers and accurate results. It quickly checks defective, waste, and hazardous cells in four steps. All data standards comply with common lithium battery industry standards and are accurate and practical.
First: The testing method in this article targets the most commonly used 3.7V ternary lithium battery cells (compatible with digital, energy storage, and power banks), and does not contain lithium iron phosphate or lead-acid batteries to avoid confusion in parameters.
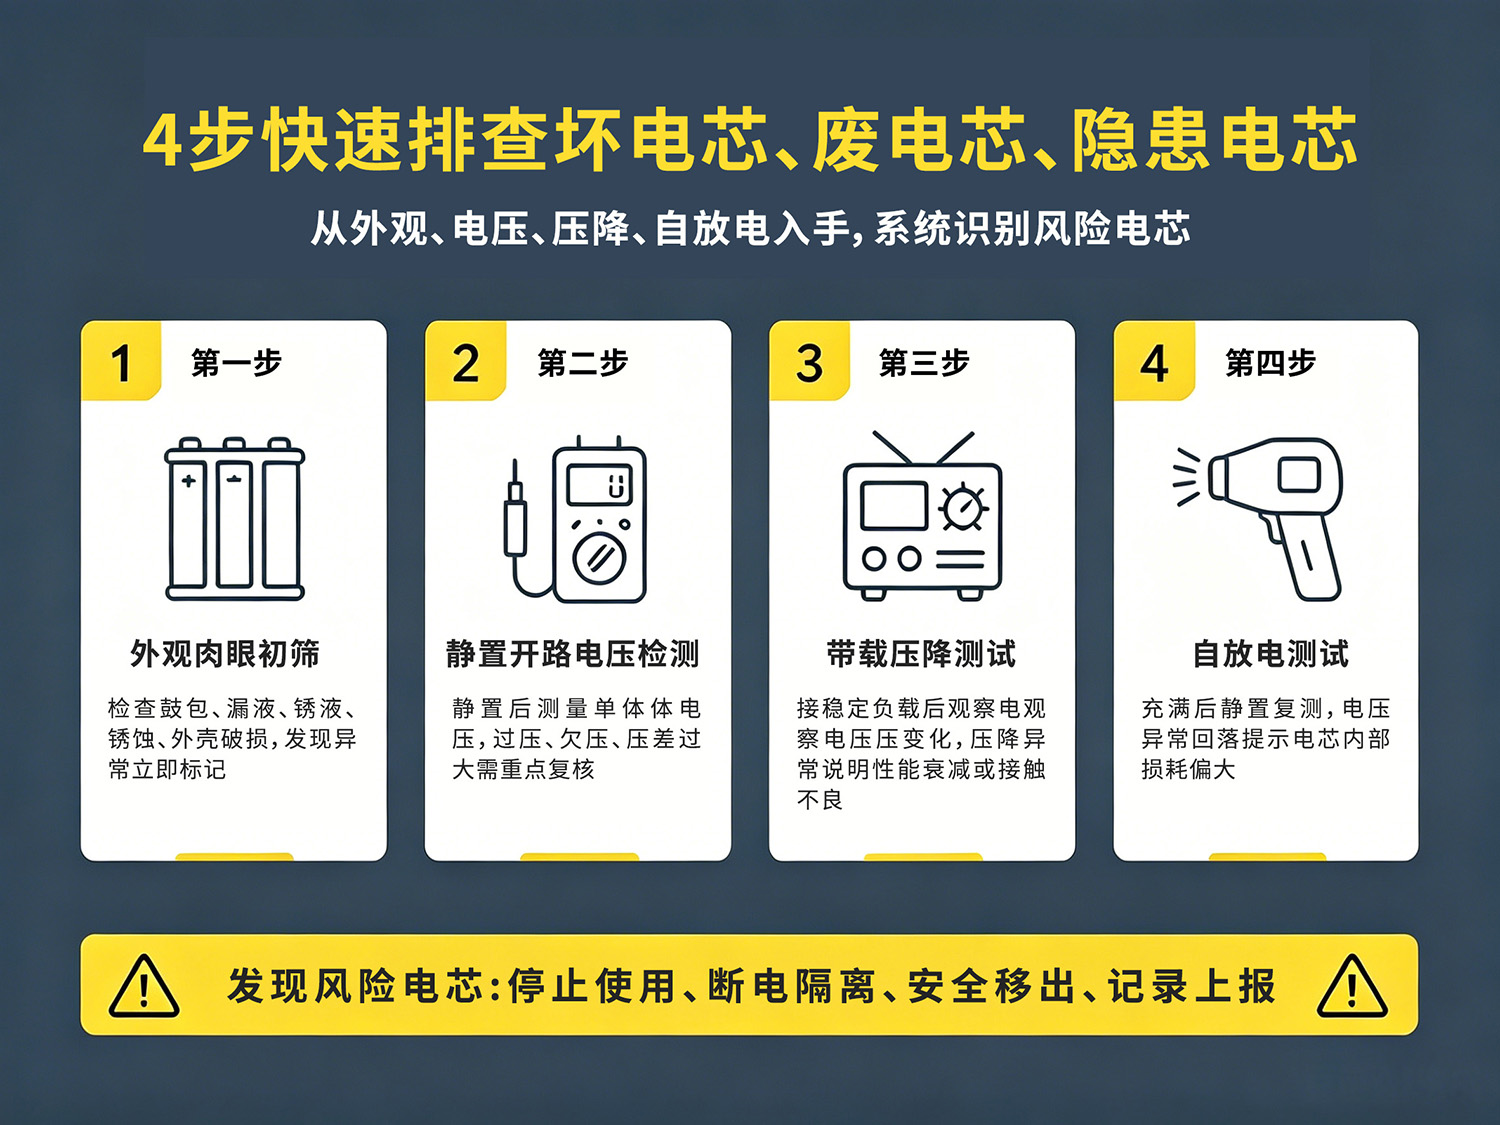
Step 1: Initial visual screening of appearance (80% of defective cells eliminated in 10 seconds)
Without any tools, you can visually eliminate problematic cells. This is the most basic and important first step. Cells with abnormal appearance are scrapped immediately, without the need for follow-up inspection.
❌ Characteristics of Defective Cells (Simply discard if any one occurs)
• Bulge deformation: Aluminum shells and polymer cell casings are raised or uneven, with deformed edges and corners. This indicates that the internal electrolyte decomposes and produces gas, and continued use carries risks of fire and explosion
• Leakage or crystals: White powder or viscous liquid appearing on the electrode column or casing indicates electrolyte leakage, insulation failure, and a high risk of short circuits
• Damaged outer shell or exposed aluminum: Insulation coating cracks or falls off, exposing the metal outer shell of the battery cell, posing risks of short circuits and leakage
• Electrode pillars blacken, ablation, rust: oxidation, blackening, scratches, and rusting of the positive and negative electrode contacts can cause poor contact, overheating, and severe pressure drops
• Severe disassembly marks: The cells show obvious signs of compression, grinding, or dents, and the internal electrode sheets are likely damaged, resulting in unstable performance
✅ Qualified cell appearance standards
The casing is flat and free of bulges, the insulation is intact and clean, the pole column is bright and free of oxidation, no leakage or dents, and the workmanship is regular.
Step 2: Static open-circuit voltage detection (to determine the basic health of the cell)
Once the appearance is fine, first use a multimeter to measure the open-circuit voltage, which is the core basic indicator for determining whether the cell is depleted or aged. Key point: static testing is necessary for data to be accurate.
Prerequisites for Testing (Crucial!) Many people have tested it wrong)
Stop charging, discharging, and leave the cells idle for more than 2 hours to stabilize the voltage and avoid false voltage interference.
Operating Method
1. Set the multimeter to the DC voltage range (V marked with horizontal lines, not AC wavy lines).
2. Connect the red pen to the positive terminal of the battery cell, the black pen to the negative terminal, and read the value once stabilized
3.7V Three-Component Cell Voltage Determination Standard (Precise and General)
• 4.15V–4.20V: Fully charged, excellent basic cell condition
• 3.80V–4.10V: Normal voltage, no battery cell depleted, in good condition
• 3.00V–3.70V: Low voltage depletion; can be retested after small current replenishment; direct installation is not recommended
• < 3.0V</b20>: Severe battery depletion and deep aging, likely internal resistance exceeding limits, capacity dropping, and immediate scrapping
• >4.22V: Abnormal overvoltage, overcharge damage, extremely high safety risk, prohibited from use
Pitfall Warning: Normal voltage doesn't necessarily mean the cell will be good! Many aging cells have normal no-load voltage, but after being loaded, they will quickly drop voltage, so the next load test must be performed.
Step 3: Load voltage drop test (quickly distinguish between old and new cells from genuine cells)
This is the most practical and effective way for ordinary people to identify inferior cells, directly exposing the illusion of falsely labeled, aged, and high-resistance cells. The core difference in battery cells is not in no-load voltage, but in load capacity.
Simple practical method (no professional load meter required)
Find a regular high-power load (5V/2A load resistor or low-power LED beads are both acceptable), connect it to the positive and negative terminals of the cell, run the load continuously for 10 seconds, and observe the voltage changes.
Result Determination Criteria
• High-quality new battery cell: 10 seconds under load, voltage drops by <0.05V, voltage remains stable without fluctuations</b12>
• Regular usable cells: with load voltage drop of 0.05V–0.10V, slight fluctuations, suitable for normal daily use
• Aging/Inferior Cells: Voltage drop > 0.15V, rapid voltage drop, severe value fluctuations, manifesting as power available but unable to carry loads, and equipment quickly loses power
Simply put: the greater the voltage drop, the higher the internal resistance of the cell. Cells with excessive internal resistance will severely overheat, consume power quickly, and reduce battery life during operation, making long-term use highly prone to safety accidents.
Step 4: Self-discharge test (troubleshooting faulty cells)
Some cells have normal appearance, voltage, and load but have hidden faults. After a few days of idleness, they run out of power, meaning self-discharge exceeds limits. After installation, these cells can cause rapid power loss and unexplained battery loss after installation.
Simple detection methods
1. Fully charge the cell to 4.20V and record the initial voltage
2. Leave at room temperature for 48 hours without any charge/discharge operations
3. Measure the voltage after standing again and compare the difference
Determination criteria
• Qualified cells: 48-hour voltage drop of ≤0.03V, almost no power loss
• Slight aging: voltage drop 0.03V–0.08V, suitable for low-speed use, not suitable for high-power equipment
• Scrapped cells: voltage drop > 0.10V, severe self-discharge, micro-short circuits inside, resolutely discarded
Ultimate summary: Quick tips for judging battery cell quality
Here is a minimalist shorthand version for everyone, so you can directly compare it with daily checks:
First, look at the appearance: bulging, leaking, and peeling, just scrap it without needing testing
Second, check static voltage: Below 3V or over 4.22V, it must not be used
Third, test with load voltage: voltage drop exceeding 0.15V, excessive internal resistance indicates faulty cores
Fourth, check for self-discharge: Obvious power loss within two days, hidden illnesses and hidden dangers
Additional note: Common beginner misconceptions (90% of people have fallen into these traps)
1. Judging cell quality solely by no-load voltage: a big mistake! No-load voltage only reflects the amount of charge, not internal resistance, aging level, or load capacity
2. Direct charging and installation of low-voltage cells: Cells that have long been below 3V and depleted will suffer loss of capacity and stability even after charging, so they are not recommended for main use
3. Neglecting self-discharge detection: Cells with excessive self-discharge are hidden safety hazards, easily overheating and swelling when idle